Make Creamy Smothered Chicken and Rice in 30 Minutes
Busy weeknights call for quick, flavorful meals. This one-pan dish delivers both—ready in just 30 minutes with minimal cleanup. Perfectly tender protein and fluffy grains come together in a rich, satisfying blend.
The secret lies in the technique. Searing locks in juices, while a blend of ranch seasoning and cheddar adds depth. Customize it with veggies or spice for a personal touch. No need to sacrifice flavor for speed.
With basic tools like a skillet and simple steps, even beginners can master this recipe. Prep ahead by measuring ingredients to save even more time. It’s a versatile meal that fits low-carb diets or spice lovers alike.
Key Takeaways
- Ready in 30 minutes—ideal for hectic evenings
- One-pan cooking means easy cleanup
- Ranch and cheddar create a bold flavor profile
- Adaptable for dietary needs or taste preferences
- Proper heat ensures quick, even cooking
Why You’ll Love This Creamy Smothered Chicken and Rice
Craving a hearty comfort food that’s both quick and satisfying? This smothered chicken delivers bold flavors with minimal effort. Ranch seasoning and thyme create a depth that feels gourmet, while cream cheese transforms into a velvety sauce.
It’s a versatile dish for weeknight dinners or potlucks. The protein-carb balance makes it a complete meal, and leftovers taste even better the next day.
“My kids devour it—even the picky ones!”
Skip takeout: this version costs less and packs 23g of protein per serving. Add bacon for crunch or adjust spice levels to suit your crew. One pan means easy cleanup, leaving more time to relax.
Essential Ingredients for Creamy Smothered Chicken and Rice
Quality components transform simple meals into memorable ones. This dish relies on pantry staples and a few specialty items for depth. Below, we break down each element for foolproof results.
Chicken and Seasonings
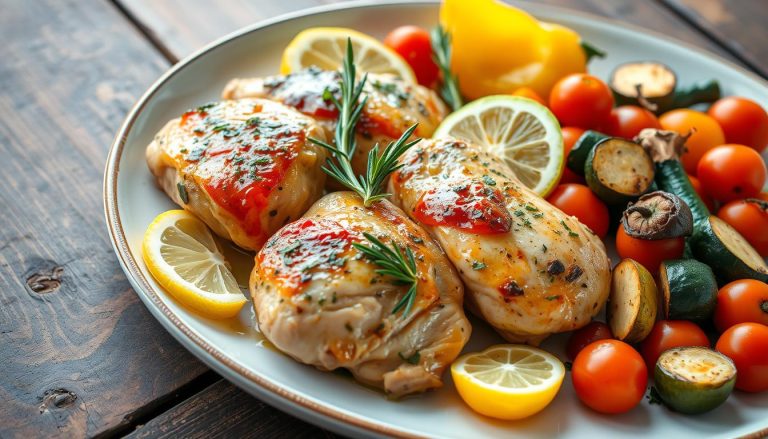
Boneless, skinless chicken breasts cook evenly and quickly. A blend of salt, pepper, and teaspoon garlic powder enhances their natural flavor. Onion powder adds sweetness, balancing the savory notes.
Paprika lends a smoky touch. For richer taste, try bone-in thighs—just adjust cooking time.
Creamy Sauce Components
Full-fat dairy like cream cheese ensures a velvety texture. Sour cream introduces acidity, cutting through richness. Avoid low-fat substitutes—they curdle easily.
Kitchen Bouquet (a browning sauce) deepens color. For gluten-free needs, cornstarch thickens just as well.
Rice and Broth Basics
Long-grain white rice stays fluffy, while short-grain turns sticky. Chicken broth infuses more flavor than water. For dietary swaps, quinoa or cauliflower rice work too.
| Ingredient | Substitution | Notes |
|---|---|---|
| Chicken breasts | Thighs or plant-based protein | Adjust cook time for thighs |
| Heavy cream | Coconut milk (full-fat) | Adds subtle sweetness |
| All-purpose flour | Cornstarch (GF) | Mix with cold water first |
Kitchen Tools You’ll Need
The right tools make cooking effortless and efficient. With the proper gear, you’ll save time and avoid common pitfalls. Here’s what to grab before you start.
- 12″ cast iron skillet: Heavy-bottom pans like Le Creuset distribute heat evenly, preventing burns. Avoid non-stick for a proper sear.
- Sturdy tongs: Flip protein without tearing. Metal ones withstand high heat.
- Meat thermometer: Models like ThermoPop ensure perfect doneness every time.
Pro Tip: A tight-fitting lid traps steam, speeding up simmering. Electric skillets or Dutch ovens work too.
Prep Tools:
- Glass measuring cups for liquids
- Mixing bowls and measuring spoons
- Chopping boards for quick ingredient prep
Pinch bowls keep spices organized. A garlic press or rice cooker saves effort but isn’t essential.
Cleaning Hack: Soak baked-on cheese with warm, soapy water. Skip abrasive scrubbers on cast iron.
Prepping the Chicken for Maximum Flavor
Perfectly prepped protein makes all the difference in this dish. Start with chicken breasts of even thickness—pound them to ½-inch for uniform cooking. Pat them dry with paper towels; moisture is the enemy of a golden crust.
Seasoning the Chicken Breasts
Generously coat both sides with salt, pepper, and garlic powder. For deeper flavor, add smoked paprika or a pinch of thyme. *Pro Tip:* Let the seasoning sit for 5 minutes to adhere better.
Searing to Perfection
Heat a skillet over medium-high heat with 1 tbsp oil (avocado or grapeseed work best—high smoke point). Sear the chicken breasts for 5–6 minutes per side until a caramelized crust forms. Avoid overcrowding; cook in batches if needed.
“That golden-brown color? That’s the Maillard reaction—it’s where flavor magic happens.”
Once seared, set aside the chicken on a plate. Don’t wipe the pan—the browned bits (fond) will enrich your sauce. Carryover cooking ensures juicy results, so aim for 160°F before resting.
- Visual cue: Look for a deep amber crust—no pale spots.
- Time-saver: Prep seasoning while the pan heats.
- Mistake to avoid: Flipping too soon—wait for the meat to release naturally.
Creating the Creamy Sauce
A velvety sauce transforms simple ingredients into something extraordinary. It’s the glue that binds flavors, turning a good dish into a memorable one. Nail the texture and balance, and you’ve won half the battle.
Mixing the Base
Start with a ranch seasoning blend whisked into sour cream or Greek yogurt. This creates a tangy, herby foundation. For dairy-free versions, cashew cream works beautifully.
Gradually add liquids—first broth, then milk—to prevent clumping. Pro Tip: Warm liquids blend easier than cold. A roux (butter + flour) thickens the sauce, while cornstarch suits gluten-free needs.
“Emulsion is science: fat and liquid bond when introduced slowly.”
Adjusting Consistency and Flavor
Test viscosity by coating a spoon. If it drips, simmer longer. Too thick? Stir in a teaspoon of broth or lemon juice for acidity.
Fix a broken sauce by blending in 1 tbsp hot water or cream. For depth, add mushroom powder or a splash of white wine. Keep heat low to avoid curdling.
- Make-ahead: Store the base for 3 days; reheat gently.
- Flavor boosters: Garlic powder, smoked paprika, or Dijon mustard.
- Texture hack: Blend soaked cashews for dairy-free silkiness.
Cooking the Rice to Fluffy Perfection
Mastering rice texture elevates your meal from good to great. The right liquid ratio and technique ensure light, separate grains. Avoid mushiness by rinsing long-grain varieties until water runs clear.
Use a 2:1 ratio—2 cups liquid per 1 cup rice. Swap water for broth to infuse deeper flavor. For foolproof measurement, place your fingertip on the rice—liquid should reach the first knuckle.
“Undisturbed cooking is key. Peeking releases steam and leads to uneven results.”
Toast grains in oil first for a nutty taste. Simmer covered on low heat—no stirring! If rice is undercooked, add 2 tbsp hot liquid and steam for 5 more minutes.
| Rice Type | Liquid Ratio | Cooking Time |
|---|---|---|
| Long-grain white | 2:1 | 18–20 minutes |
| Basmati | 1.75:1 | 15–17 minutes |
| Jasmine | 1.5:1 | 12–15 minutes |
Fluff with a fork to separate grains gently. For rice cookers, reduce liquid by ¼ cup—they trap more steam. Store leftovers airtight in the fridge for up to 3 days.
Combining Everything in the Skillet
Bringing all components together creates harmony in every bite. Proper layering ensures even cooking, while controlled heat unlocks rich flavors. Follow these steps to transform your ingredients into a unified dish.
Layering Ingredients
Start with sautéed vegetables—onions and bell peppers—to form a flavorful base. Place seared protein atop them, followed by the rice mixture. This order prevents grains from sticking to the skillet.
Pour sauce evenly over the top to submerge rice fully. Starch release thickens the liquid, creating a luscious texture. Pro Tip: Avoid stirring after layering to maintain distinct layers.
Simmering for Richness
Cover the skillet and reduce heat to low. Let it simmering for 15–20 minutes—steam cooks rice while infusing flavors. Deglaze browned bits with broth for extra depth.
“Low and slow is the mantra here. Rushing ruins the texture.”
- Visual cue: Liquid should absorb fully; no pools remain.
- Emergency fix: Add broth if the mixture dries out.
- Oven option: Transfer to a 350°F oven for hands-off cooking.
How to Know When Your Dish Is Ready
Perfect doneness comes down to precision. Use a meat thermometer to check the thickest part of the protein—165°F ensures safety without dryness. For thighs, aim for 175°F for optimal tenderness.
Rice should be tender but not mushy. Press a grain between your fingers—it should yield easily. The sauce thickens as it cools, so slightly runnier is better during cooking.
“Carryover cooking raises temps by 5–10°F. Pull food early to avoid overcooking.”
Rest the dish for 5 minutes before serving. This lets juices redistribute and sauces set. Undercooked? Cover and simmer for 3–5 more minutes with extra broth.
- Visual cues: No pink in protein, golden rice edges
- Texture test: Sauce coats the back of a spoon
- Safety check: Dairy-based sauces should bubble gently
For crispy toppings like cheese or breadcrumbs, broil for 1–2 minutes at the end. Serve when steam rises evenly—a sign of thorough heating.
Serving Suggestions for Creamy Smothered Chicken and Rice
Elevate your meal with thoughtful presentation and complementary flavors. The right pairings balance textures and enhance the dish’s richness. Here’s how to serve it like a pro.
Perfect Pairings
Pair with lighter sides like crisp salads or roasted vegetables. The contrast cuts through the dish’s richness. For a classic comfort food combo, try garlic mashed potatoes or butter biscuits.
“A buttery Chardonnay or amber ale complements the creamy sauce beautifully.”
| Side | Why It Works |
|---|---|
| Braised cabbage | Adds tangy crunch |
| Steamed green beans | Lightens the meal |
| Cornbread | Great for sauce mopping |
Garnishing Like a Pro
Top with fresh herbs like parsley or green onions for color. A sprinkle of paprika adds vibrancy. For kids, skip garnishes or use fun shapes.
- Color theory: Green herbs pop against creamy sauces.
- Temperature: Serve on warm plates to keep food hot.
- Portions: Use smaller plates for better control.
Perfect for a cozy dinner or buffet spread. Let guests customize with extra toppings like grated cheese or hot sauce.
Storing and Reheating Leftovers
Smart storage keeps your meals fresh and flavorful for days. Whether you’re meal prepping or saving extra portions, these methods preserve texture and taste. Follow these guidelines to enjoy your dish safely later.
Refrigeration Guidelines
Cool your meal completely before storage—about 30 minutes at room temperature. Use shallow, airtight containers to speed cooling and prevent bacterial growth. Glass containers with locking lids work best for refrigeration.
- Timing: Consume within 3-4 days for best quality
- Reheating: Heat to 165°F, stirring occasionally for even warmth
- Moisture hack: Add a splash of broth when reheating to revive rice
- Separation fix: Whisk sauces gently if dairy components separate
Freezing for Future Meals
Portion your meal into single servings before freezing. Vacuum-sealed bags prevent freezer burn, while aluminum pans with foil work for larger quantities. Label each container with dates to track freshness.
- Duration: Maintains quality for up to 2 freeze months
- Thawing: Transfer to fridge 24 hours before reheating
- Texture tip: Set aside creamy toppings to add fresh after reheating
- Prevention: Press plastic wrap directly on surface to block ice crystals
For best results, reheat frozen portions in a 350°F oven covered with foil. Stir halfway through and add liquid as needed. The stovetop method works too—just use low heat and stir frequently.
Variations to Try
Switch up your routine with creative twists on this classic dish. Small changes to ingredients or preparation can create entirely new flavor profiles. Whether you’re accommodating diets or just craving variety, these adaptations keep meals exciting.
Spicy Kick Option
Turn up the heat with simple additions. Add diced jalapeños for fresh heat or cayenne pepper for intense spice. For smoky depth, mix in chipotle chilies with their adobo sauce.
Dijon mustard or hot sauce blends seamlessly into the creamy base. Start with small amounts—you can always add more. Pro Tip: Serve with cool toppings like sour cream to balance the heat.
Low-Carb Alternatives
For a low-carb version, swap regular rice for cauliflower rice. Reduce cooking time since it doesn’t need as long to soften. Almond flour makes a great thickener instead of traditional options.
Increase protein by adding extra meat or cheese. Leafy greens like spinach bulk up the dish without adding carbs. This adaptation works well for keto or diabetic diets.
Vegetable Add-Ins
Boost nutrition with colorful vegetable additions. Mushrooms add earthy flavor, while bell peppers provide crunch. Seasonal picks like zucchini or butternut squash keep things fresh year-round.
Frozen mixed veggies work in a pinch. Add delicate greens like spinach at the end to prevent wilting. Roasted vegetables bring deeper, caramelized notes to the dish.
“The best recipes evolve with your tastes—don’t be afraid to experiment.”
- Protein swaps: Try shrimp, tofu, or turkey for variety
- Global flavors: Add curry powder for Indian or soy sauce for Asian-inspired versions
- Budget tips: Use frozen vegetables or less expensive cuts of meat
- Special occasions: Top with gourmet ingredients like truffle oil or crab meat
Common Mistakes to Avoid
Even simple dishes can go wrong with a few missteps. Knowing what to watch for helps you nail this recipe every time. From heat control to ingredient prep, small details make a big difference.
Overcrowding the skillet is a top error. It lowers the pan’s temperature, causing steaming instead of searing. Cook in batches for even browning—your protein will thank you.
Wrong heat levels ruin texture. Too high burns the outside before the inside cooks. Too low makes food greasy. Adjust as needed between searing and simmering stages.
“Patience pays off—rushing leads to rubbery textures or broken sauces.”
Seasoning mistakes are common. Adding salt too early draws out moisture. Wait until the last minute for crisp results. Taste as you go—underseasoned food falls flat.
The mixture matters. Overmixing sauces makes them lumpy. Stir gently and add dairy slowly to prevent curdling. For breading, pat meat dry first so it sticks better.
| Mistake | Fix |
|---|---|
| Wrong rice variety | Use long-grain for fluffy results |
| Freezing improperly | Cool completely before storing |
| Poor presentation | Garnish with fresh herbs |
Timing errors affect quality. Reheating too fast dries out leftovers. Let frozen meals thaw overnight in the fridge. For fresh servings, rest cooked food 5 minutes before plating.
Substitutions can backfire. Low-fat dairy often separates. Test swaps in small batches first. When in doubt, stick to the original recipe until you master it.
Conclusion
This quick dish proves comfort food doesn’t need hours to impress. Ready in half an hour, it’s a meal that fits busy lives without skimping on flavor. Protein-packed and wholesome, it balances nutrition with indulgence.
Swap ingredients to match your taste or diet. Leftovers? They reheat beautifully, making it a meal prep superstar. Share your twist online—we love seeing your creations!
Pro tip: Add it to your weeknight rotation for stress-free dinners. One-pan cooking means more time enjoying, less time cleaning. You’ve got the skills to make this shine—now dig in!

