Cheesecake Crescent Rolls Casserole: Quick Delicious Dessert!
Looking for a dessert that’s both simple and impressive? This cheesecake crescent rolls casserole is the answer. It combines the creamy richness of cream cheese with the flaky texture of crescent roll dough, creating a treat that’s hard to resist.
Perfect for busy days, this recipe comes together in just a few steps. Whether you’re hosting a brunch or need a last-minute dessert, it’s a guaranteed crowd-pleaser. The blend of sweet and buttery flavors makes it a favorite for any occasion.
With minimal prep time and easy-to-find ingredients, this dish is foolproof. Even if you’re not an experienced baker, you’ll achieve delicious results. It’s a versatile option that can be customized with your favorite toppings or flavors.
Key Takeaways
- This dessert combines creamy cream cheese with flaky crescent roll dough for a perfect balance of flavors.
- It’s quick to prepare, making it ideal for busy schedules.
- The recipe is versatile and can be customized with various toppings.
- It’s a crowd-pleaser, suitable for casual dinners or special occasions.
- Even beginners can achieve great results with this simple recipe.
Introduction to This Delicious Dessert
If you’re searching for a dessert that’s both effortless and unforgettable, this recipe is for you. It’s a perfect blend of creamy and flaky textures, making it a standout choice for any occasion. Whether you’re hosting a gathering or simply treating yourself, this dish is sure to impress.
What Makes This Recipe a Must-Try
The magic lies in the combination of rich cream cheese and buttery dough. This pairing creates a harmonious balance of flavors that’s hard to resist. With just a few simple ingredients like sugar and vanilla, you can whip up a dessert that feels gourmet but is surprisingly easy to make.
What sets this recipe apart is its versatility. You can customize the fill with your favorite flavors or toppings, making it a hit with everyone. Plus, the preparation is so straightforward that even beginners can achieve professional-looking results.
The Story Behind the Creation
This recipe was born out of a desire to create something special without spending hours in the kitchen. The creator, a busy home cook, wanted a dessert that could be prepared in just 20 minutes. By combining cream cheese and crescent dough, they stumbled upon a winning formula that’s now a family favorite.
The story adds a personal touch, making the recipe relatable and inspiring. It’s proof that great food doesn’t have to be complicated. With minimal effort, you can create a dessert that looks and tastes like it came from a bakery.
So why not give it a try? This recipe is not just about the flavors—it’s about the joy of creating something delightful with ease. Whether you’re a seasoned baker or a novice, this dish is sure to become a go-to in your recipe collection.
Ingredients and Essential Preparation Tips
The secret to a perfect dessert lies in the quality of its ingredients. Start with softened cream cheese and refrigerated dough for the best results. These two elements are the backbone of this recipe, ensuring a creamy filling and flaky crust.

Highlighting Crescent Roll Dough and Cream Cheese
Using crescent roll dough is a game-changer. It’s pre-made, saving you time and effort. For the filling, softened cream cheese is essential. Let it sit at room temperature for about 10 minutes before mixing. This ensures a smooth, lump-free texture.
Combine the cream cheese with 1 cup of sugar and 1 teaspoon of vanilla extract. This creates a rich, sweet filling that balances the buttery dough. Don’t forget to add 1 tablespoon of cinnamon to the sugar topping for a warm, aromatic finish.
Tips for Perfect Ingredient Preparation
Preparation is key to success. Preheat your oven to 350°F (175°C) while you work. Grease your baking dish to prevent sticking. Measure ingredients like sugar and cinnamon precisely—use 1 tablespoon of cinnamon and 2 tablespoons of sugar for the topping.
Melt ¼ cup of butter for brushing the dough. This adds a golden, crispy layer. If you’re short on time, prepare the dish the night before and refrigerate it. Bake it the next day for a fresh, warm dessert.
Finally, share your creation with friends and family. This recipe is perfect for gatherings or a cozy night in. With these tips, you’ll achieve a dessert that’s both delicious and visually appealing.
Cheesecake Crescent Rolls Casserole: A Quick and Delicious Dessert!
Ready to create a dessert that’s both easy and impressive? This recipe walks you through each step, ensuring a flawless result. From preparing the dough to achieving a golden top, you’ll master the process with ease.

Step-by-Step Assembly Process
Start by preheating your oven to 350°F (175°C). Unroll the crescent roll dough and press the seams together to form a smooth layer in a 9×13-inch baking dish. This ensures an even base for your casserole.
Next, mix softened cream cheese with 1 cup of sugar and 1 teaspoon of vanilla extract. Spread this creamy filling evenly over the dough. The combination of sweet and tangy flavors will make every bite irresistible.
Top the filling with another layer of roll dough. Press the edges gently to seal. For a flaky finish, brush melted butter over the top and sprinkle with a mix of cinnamon and sugar.
How to Achieve a Flaky, Golden Top
The secret to a perfect crust lies in the butter and sugar topping. Use ¼ cup of melted butter and a mix of ½ cup sugar and 1 teaspoon of cinnamon. This creates a caramelized, golden layer that’s both crispy and sweet.
Bake the casserole for 30-35 minutes, or until the top is golden brown. Let it cool for 10 minutes before slicing. This brief resting period helps the layers set, ensuring neat, clean slices.
For a twist, try using puff pastry instead of crescent roll dough. It adds an extra layer of flakiness and elevates the dish. Whether you’re a beginner or a seasoned baker, these tips guarantee a dessert that’s as beautiful as it is delicious.
Creative Variations and Customization Ideas
Transform your favorite treat with these creative ideas. Whether you’re a fan of fruity flavors or crave a chocolatey twist, this recipe is highly adaptable. With a few simple tweaks, you can make it your own.

Adding Fresh Fruit or a Chocolate Twist
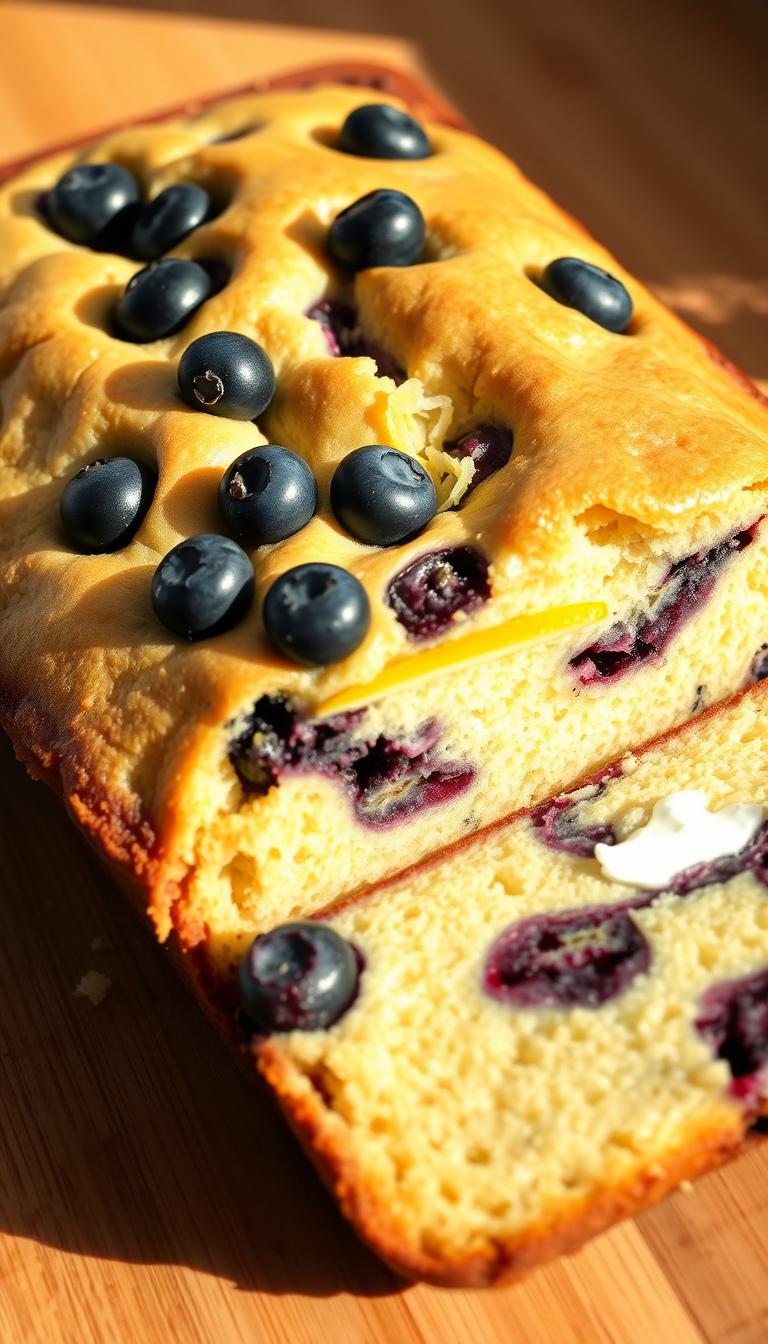
For a fruity version, try adding fresh blueberries or raspberries to the cream cheese filling. Layer them evenly to ensure every bite is bursting with flavor. Alternatively, mix in mini chocolate chips for a decadent treat.
If you prefer a citrusy note, add a teaspoon of lemon zest to the filling. This adds a refreshing zing that complements the creamy cheesecake base. For a richer flavor, drizzle melted chocolate over the top before serving.
When layering your baking dish, ensure the fruit or chocolate is evenly distributed. This prevents any one area from becoming too heavy or unbalanced. A smooth, consistent layer is key to a perfect result.
Brush the top with melted butter for a golden, flaky finish. Sprinkle with cinnamon sugar for added sweetness. These small touches elevate the dish, making it visually appealing and delicious.
Customizing this recipe is easy and fun. Whether you’re serving it for breakfast, brunch, or dessert, these variations add a personal touch. Experiment with different flavors to find your favorite combination.
Storage, Make-Ahead, and Reheating Guidelines
Keeping your dessert fresh and flavorful is easier than you think. With the right techniques, you can enjoy it days after baking. Whether you’re planning ahead or saving leftovers, these tips ensure your dish stays perfect.

Best Practices for Leftovers and Freezing
Start by letting your dish cool completely before storing. Cover it tightly with plastic wrap or aluminum foil. For refrigeration, use an airtight container to keep the cheese filling fresh. It will stay good for up to 2 days.
Freezing is a great option for longer storage. Wrap individual slices in plastic wrap, then place them in a freezer-safe bag. This method preserves the flaky texture and prevents freezer burn. Thaw in the fridge overnight before reheating.
When reheating, use your oven for the best results. Preheat it to 350°F (175°C) and warm the dish for about 10 minutes. This restores the golden, crispy top. For a quicker option, use the microwave, but keep it to 30-60 seconds to avoid sogginess.
These strategies ensure your dessert maintains its taste and texture, whether you’re enjoying it fresh or reheated. With these tips, you can savor every bite, even days later.
Conclusion
Discover a treat that’s both simple and satisfying. This recipe combines creamy filling with flaky dough, making it a perfect choice for any day. Whether you’re a beginner or a seasoned baker, the steps are easy to follow, and the results are always impressive.
With Pillsbury crescent rolls as the base, you’ll achieve a golden, flaky crust every time. Add a sprinkle of cinnamon sugar for a touch of sweetness. The versatility of this dish allows you to customize it with your favorite toppings, making it a hit with everyone.
Remember, storing leftovers is a breeze. Use an airtight container to keep it fresh for days. When reheating, a quick tip is to use the oven for that perfect, crispy finish.
Share this delightful creation with friends and family. It’s a sure way to spread joy and satisfy any sweet craving. Try it today and see why this recipe is a must-have in your collection.