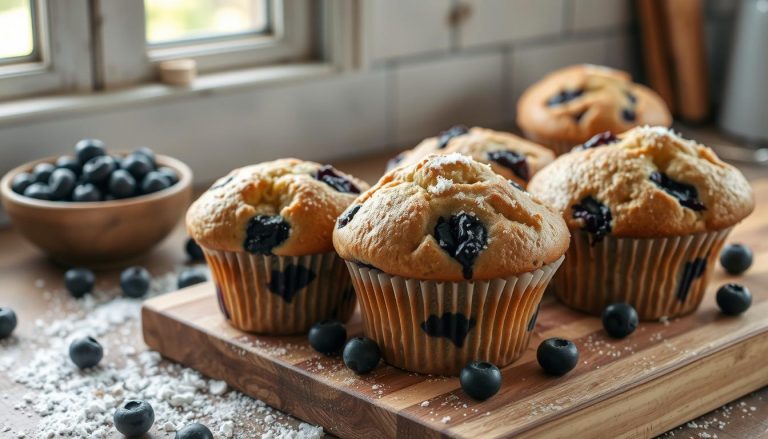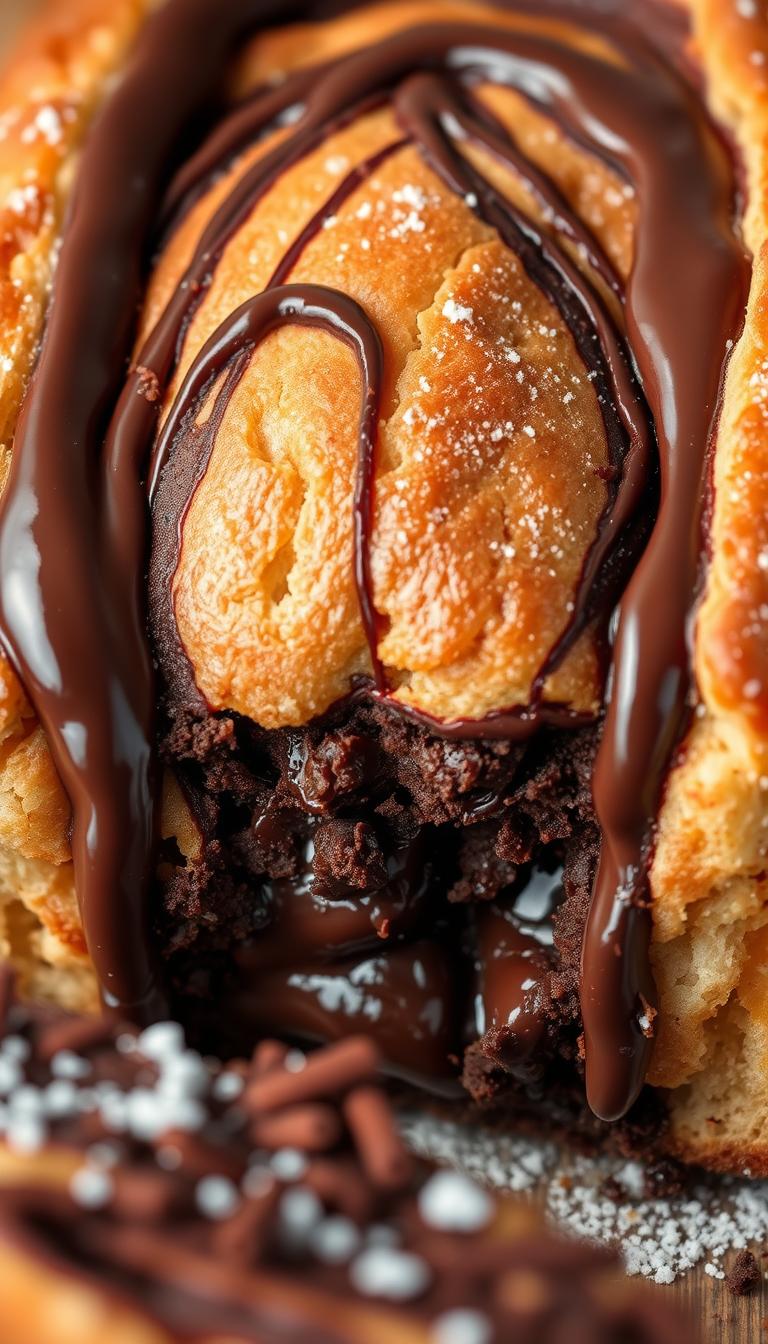
Hot Fudge Brownie Bread: A Delicious Homemade Treat
There’s something magical about the aroma of chocolate wafting through your kitchen. It’s a scent that brings people together, evoking memories of family gatherings and cozy afternoons. Today, we’re introducing a recipe that combines the best of two worlds: the moist, gooey texture of brownies and the comforting simplicity of quick bread.
This hot fudge brownie bread is more than just a dessert. It’s a versatile treat that works for breakfast, parties, or a sweet ending to any meal. With a rich chocolate flavor and a decadent drizzle of hot fudge sauce, it’s sure to become a family favorite.
What makes this recipe stand out is its ease of preparation. Using common ingredients, you can whip up this indulgent loaf in no time. Whether you’re a seasoned baker or a beginner, this fudge brownie creation is designed to delight everyone at the table.
Key Takeaways
- Combines the best of brownies and quick bread for a unique treat.
- Rich chocolate flavor enhanced with a drizzle of hot fudge sauce.
- Perfect for breakfast, parties, or dessert.
- Easy to prepare with common ingredients.
- Family-friendly and versatile for any occasion.
Introduction to Hot Fudge Brownie Bread
Imagine a dessert that combines the richness of chocolate with the comforting texture of bread. This recipe has become a family favorite for its unique blend of flavors and ease of preparation. It’s a treat that brings people together, whether for breakfast, dessert, or a special occasion.
What makes this recipe stand out is its perfect balance. It takes the dense, gooey texture of a brownie and pairs it with the airy, sliceable quality of quick bread. The result is a dessert that’s both indulgent and practical. Using a loaf pan ensures each slice resembles traditional bread, making it easy to serve and enjoy.
The secret to its irresistible appeal lies in the fudge sauce. This decadent drizzle adds a layer of gooey richness that elevates the entire dish. It’s the kind of touch that turns a simple recipe into something extraordinary.
One of the best things about this recipe is its simplicity. With common ingredients and straightforward steps, it’s accessible to bakers of all skill levels. Whether you’re a novice or a seasoned pro, you’ll find this dessert easy to make and impossible to resist.
“It’s the perfect blend of indulgence and comfort, making it a hit with everyone who tries it.”
From its family-friendly appeal to its indulgent chocolate experience, this recipe is designed to delight. It’s a versatile treat that works for any occasion, proving that sometimes the simplest ideas are the most memorable.
What Makes This Dessert a Must-Try?
The perfect dessert exists when two classic treats unite in one irresistible creation. This recipe blends the rich, dense flavor of a brownie with the familiar, sliceable form of quick bread. The result is a dessert that’s both indulgent and practical, making it a standout for any occasion.

Celebrating Chocolate and Quick Bread Traditions
Quick bread has a long history, rooted in simplicity and convenience. By adding a modern twist with chocolate, this recipe pays homage to tradition while offering something new. The use of a loaf pan ensures each slice has the perfect balance of moistness and structure.
Every bite celebrates the rich, decadent flavor of chocolate. The recipe’s unique structure keeps the dessert firm yet tender, creating a texture that’s hard to resist. It’s a treat that bridges the gap between classic and contemporary.
An Irresistible Treat for Every Occasion
This dessert is as versatile as it is delicious. Whether you’re hosting a party, enjoying a family gathering, or simply treating yourself, it’s the perfect centerpiece. Its loaf shape makes it easy to serve, while the rich flavor ensures it’s always a crowd-pleaser.
From breakfast to dessert, this treat fits seamlessly into any meal. Its combination of simplicity and indulgence makes it a must-try for anyone who loves chocolate. Once you try it, you’ll understand why it’s become a favorite for so many.
Essential Ingredients and Flavor Boosters
The foundation of any great dessert lies in its ingredients. For this indulgent treat, each component plays a vital role in creating the perfect balance of flavor and texture. Let’s dive into the essentials and explore how you can enhance or substitute them to suit your preferences.
Key Ingredients Overview
This recipe relies on a few simple yet impactful ingredients. High-quality cocoa is the star, providing the rich chocolate flavor. Butter adds moisture and depth, while eggs bind everything together for a tender crumb. Flour gives structure, and sugar ensures sweetness and a shiny crust.
For the topping, a decadent sauce made from chocolate and cream ties everything together. These ingredients work in harmony to create a dessert that’s both fudgy and sliceable.

Substitutions and Enhancements for a Rich Taste
If you’re looking to customize this recipe, there are plenty of options. For a dairy-free version, replace butter with coconut oil or margarine. Almond milk can substitute for regular milk, and flaxseed works as an egg alternative.
To elevate the flavor, try using Dutch-process cocoa for a smoother taste. Adding a pinch of espresso powder enhances the chocolate notes. For the sauce, consider using dark chocolate for a deeper, more intense flavor.
Here’s a quick guide to the key ingredients and their roles:
| Ingredient | Function | Substitutions |
|---|---|---|
| Cocoa | Provides rich chocolate flavor | Dutch-process cocoa, dark cocoa powder |
| Butter | Adds moisture and richness | Coconut oil, margarine |
| Eggs | Binds ingredients for structure | Flaxseed, applesauce |
| Flour | Provides structure | Gluten-free flour, almond flour |
| Sugar | Ensures sweetness and shiny crust | Brown sugar, coconut sugar |
| Sauce | Adds gooey, decadent topping | Dark chocolate, caramel sauce |
By understanding the role of each ingredient, you can make informed choices to tailor this recipe to your taste. Whether you stick to the classic version or experiment with substitutions, the result will be a dessert that’s uniquely yours.
Detailed Recipe Steps and Baking Tips
Baking a delicious treat starts with the right preparation and attention to detail. This guide will walk you through the process, ensuring your dessert turns out perfectly every time.
Preheat, Mix, and Prepare Like a Pro
Begin by preheating your oven to 350°F (175°C). This ensures even baking and the perfect texture. While the oven heats, prepare your loaf pan by spraying it with non-stick spray or lining it with parchment paper.
Next, gather your ingredients. In a large bowl, combine the brownie mix, eggs, and oil. Stir until the batter is smooth and uniform. For an extra touch of indulgence, fold in a generous amount of hot fudge sauce. This step enhances the flavor and creates a gooey, irresistible texture.

Step-by-Step Guidance for a Perfect Bake
Pour the batter into the prepared loaf pan, spreading it evenly with a spatula. This ensures each slice bakes uniformly. Place the pan in the center of the oven for optimal heat distribution.
Bake for 30-35 minutes, or until a toothpick inserted into the center comes out with a few moist crumbs. Avoid overbaking to maintain the dessert’s fudgy interior. Once done, let it cool in the pan for 10 minutes before transferring it to a wire rack.
Here’s a quick checklist for success:
- Preheat the oven and prepare the pan.
- Mix the ingredients thoroughly for a smooth batter.
- Bake until the toothpick test shows moist crumbs.
- Cool before slicing for clean, even pieces.
By following these steps, you’ll create a dessert that’s as delightful to make as it is to eat. Enjoy the process and savor the results!
Perfecting Texture: Baking Techniques and Toothpick Test
Achieving the perfect texture in your baked goods is an art and a science. It’s about balancing moisture, structure, and doneness to create a dessert that’s both tender and indulgent. Let’s explore the techniques that ensure your treat turns out just right.

Key Techniques for a Fudgy, Moist Texture
Start by preheating your oven to 350°F (175°C). This ensures even heat distribution, which is crucial for a consistent bake. When preparing your batter, mix it thoroughly but avoid overmixing, as this can lead to a dense texture.
Bake for 30-35 minutes, checking for doneness with the toothpick test. Insert a toothpick into the center; if it comes out with a few moist crumbs, your dessert is perfectly baked. Overbaking can dry it out, so timing is key.
The Importance of Cooling
Once baked, let your dessert cool in the pan for 10 minutes. This allows it to set and prevents it from falling apart when sliced. Transfer it to a wire rack to cool completely, which enhances its structure and flavor.
Troubleshooting Tips
If your dessert turns out too dry, reduce the baking time by a few minutes next time. For an underbaked center, ensure your oven is at the correct temperature and bake for an additional 5 minutes. Remember, practice makes perfect!
Mastering Hot Fudge Brownie Bread
Unlocking the secrets to a consistently gooey and indulgent dessert starts with mastering a few expert techniques. Whether you’re a seasoned baker or a beginner, these insider tips will elevate your baking game and ensure your treat turns out perfectly every time.

Insider Secrets for an Irresistible, Gooey Treat
One of the most critical steps is the cooling process. After baking, let your dessert rest in the pan for 10 minutes. This allows it to set without losing its moisture. Then, transfer it to a wire rack to cool completely. This method ensures the texture remains fudgy and sliceable.
For an extra layer of indulgence, drizzle additional hot fudge sauce over the top once it’s cooled. This not only enhances the flavor but also adds a visually appealing finish. Use a spoon or a piping bag for precise control over the drizzle.
Maintaining the gooey texture when slicing and serving is key. Use a sharp knife and wipe it clean between cuts. This prevents the dessert from sticking and ensures clean, even slices. Serve immediately for the best experience.
Quality ingredients make all the difference. Use high-quality cocoa and fresh eggs for a rich, deep flavor. Accurate measurements are also crucial. A kitchen scale can help ensure consistency, especially with flour and sugar.
To preserve freshness, wrap your dessert tightly in plastic wrap or store it in an airtight container. It stays fresh at room temperature for up to 3 days. For longer storage, freeze individual slices wrapped in foil. Thaw at room temperature when ready to enjoy.
- Cool on a wire rack to maintain texture.
- Add extra fudge drizzle for a decadent finish.
- Use a sharp knife for clean slices.
- Choose high-quality ingredients for the best flavor.
- Wrap tightly to preserve freshness.
By following these expert tips, you’ll create a dessert that’s not only delicious but also consistently impressive. Enjoy the process and savor the results!
Variations, Add-Ins, and Serving Suggestions for Dessert Lovers
Transform your baking routine with endless possibilities for this beloved dessert. Whether you’re looking to add a personal touch or cater to different tastes, this recipe is incredibly versatile. Let’s explore creative ways to enhance and serve this treat.
Creative Add-Ins and Flavor Twists
Start by experimenting with add-ins to make the recipe your own. Fold in chocolate chips for extra richness or chopped nuts for a satisfying crunch. A dash of cinnamon or a sprinkle of sea salt can elevate the flavor profile.
For a seasonal twist, incorporate ingredients like pumpkin puree in the fall or fresh berries in the summer. If you’re baking for a special occasion, consider adding a layer of caramel or a swirl of peanut butter to the batter.

Pairing with Vanilla Ice Cream and More
Pairing this dessert with vanilla ice cream is a classic choice that never disappoints. The contrast between the warm, gooey texture and the cold, creamy ice cream creates a delightful experience.
For a more indulgent treat, drizzle extra sauce or sprinkle crushed cookies on top. If you’re serving it at a gathering, consider offering a variety of toppings like whipped cream, fresh fruit, or even a dollop of Nutella.
“The combination of warm dessert and cold ice cream is a match made in heaven.”
Presentation matters too. Serve slices on a decorative platter for family breakfasts or arrange individual portions in mini jars for festive gatherings. The possibilities are endless, making this dessert perfect for any occasion.
Storage, Reheating, and Freezing Guidelines
Keeping your dessert fresh and flavorful is easier than you think. Whether you’re saving leftovers or preparing ahead, these tips will help you maintain its texture and taste. From room temperature storage to freezing, here’s everything you need to know.
Room Temperature vs. Refrigeration Techniques
For short-term storage, room temperature works best. Wrap your dessert in tightly plastic wrap or place it in an airtight container to keep it moist. It stays fresh for up to 3 days this way.
If you prefer refrigeration, use the same wrapping method. In the fridge, it lasts up to a week. Just make sure it’s completely cooled before storing to avoid condensation.

Best Practices for Freezing and Reheating
Freezing is ideal for long-term storage. Slice your dessert into portions and wrap each piece in tightly plastic wrap. Then, place them in a freezer-safe airtight container to prevent freezer burn. It stays fresh for up to 3 months.
When ready to enjoy, thaw it at room temperature for about an hour. For a warm treat, reheat in a 300°F oven for 5-10 minutes. This restores its gooey texture and rich flavor.
“Proper storage ensures every bite tastes as good as the first.”
Here’s a quick guide to storing and reheating:
- Wrap in tightly plastic wrap or use an airtight container.
- Store at room temperature for up to 3 days or refrigerate for up to a week.
- Freeze individual slices for easy portioning and long-term storage.
- Reheat in the oven for the best texture and flavor.
By following these guidelines, you can enjoy your dessert anytime without compromising its quality. Whether you’re pairing it with vanilla ice cream or savoring it on its own, it’s sure to delight.
Tips for Enhancing Flavor and Customizing Your Recipe
Adding your personal touch to a recipe can transform it into something uniquely yours. Whether you’re a seasoned baker or just starting out, experimenting with ingredients and techniques can elevate your dessert to new heights. Here are some tips to help you enhance the flavor and make it your own.

Personal Touches and Modern Twists
Start by considering the base ingredients. Using high-quality chocolate chips can make a significant difference in flavor. For a richer taste, try adding extra chips or even mixing in different types like dark or white chocolate.
Spices can also enhance the overall profile. A pinch of cinnamon or a dash of espresso powder can deepen the chocolate flavor without overwhelming it. If you’re feeling adventurous, consider adding a swirl of peanut butter or a layer of caramel for a unique twist.
Experimenting with alternative ingredients can also yield interesting results. For example, replacing oil with avocado adds moisture and a subtle richness. Similarly, using brewed coffee instead of water can intensify the chocolate notes.
Here are some quick tips to customize your recipe:
- Add extra chocolate chips for a richer texture.
- Incorporate spices like cinnamon or espresso powder for depth.
- Try alternative ingredients like avocado or brewed coffee.
- Adjust mixing techniques to achieve your desired consistency.
- Test and adjust seasoning to match your taste preferences.
By making these small adjustments, you can create a dessert that’s uniquely yours. Remember, baking is as much about creativity as it is about following a recipe. Enjoy the process and savor the results!
Conclusion
Creating a dessert that’s both simple and indulgent is easier than you think. This recipe combines accessible ingredients like oil and eggs with straightforward steps, making it perfect for bakers of all levels. The result is a treat with a rich taste and a moist texture that’s hard to resist.
Its versatility makes it a standout for any occasion. Whether you’re serving it as a breakfast treat or a dessert, it’s sure to impress. Plus, you can easily customize it with your favorite add-ins or toppings to make it uniquely yours.
To keep it fresh, wrap it in tightly plastic or store it in an airtight container. This ensures every slice stays as delicious as the first. Ready to bake? Try this recipe today and share your results with fellow baking enthusiasts!